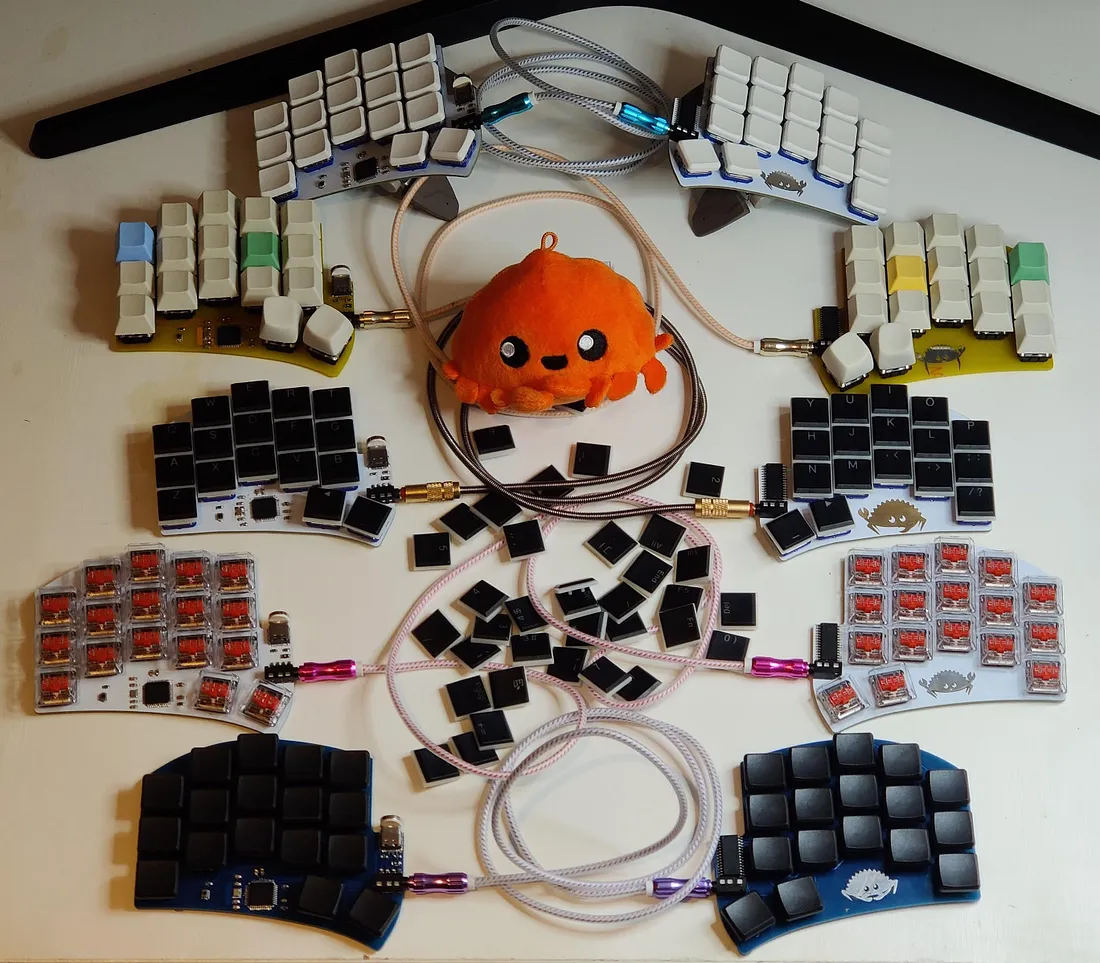
Christmas Time! A Split Mechanical Keyboard, You Can Build Yourself! 🎅
Original Article: Christmas Time! A Split Mechanical Keyboard, You Can Build Yourself! 🎅
Summary
This article guides you through building your own split mechanical keyboard from scratch, emphasizing the ergonomic benefits gained by preventing wrist tilt and relaxing arms and shoulders. I summarize essential skills required, from electronics and 3D modeling to soldering and component sourcing. The project is accessible and cost-effective, typically ranging from $50 to $150. You will learn about designing and printing a PCB (Printed Circuit Board), choosing the right mechanical switches (clicky, tactile, linear; high vs. low profile), selecting keycaps, and understanding microcontrollers like Pro Micro, Elite-C, or Nice!nano for firmware (QMK). Additionally, I discuss designing the keyboard’s casing (acrylic or 3D printed) and various extra features such as hot-swappable sockets, RGB LEDs, and OLED modules. The article provides step-by-step guidance, tips on component selection, and insights into customizing your keyboard for a unique and functional ergonomic typing experience.
What skills do you need to create one of these beauties?
Creating a custom mechanical keyboard requires a diverse set of skills, including electronics, 3D modeling, soldering, and component sourcing. Despite the range of skills, it’s a very accessible and rewarding project for anyone curious about engineering, with costs typically between $50 and $150.
The main activities involved are:
- Designing and Printing a PCB (Printed Circuit Board)
- Buying and Assembling the electronic components
- Designing and manufacturing the casing to protect the electronic and look even cooler 😎.
I) Designing and Printing a PCB
A PCB is crucial for a mechanical keyboard, providing a stable base for key switches and simplifying the soldering process. This approach also allows for ultra-light keyboard designs and saves effort compared to wiring switches manually.
I.1) Choosing the layout
The first step is to decide on your keyboard’s layout, including the number of keys and their spacing. You can compare existing split keyboard layouts to get a feel for what works best for you.
☑️ Screen and Print keyboard layouts from: splitkbcompare
You’ll discover that many split keyboards have fewer than 50 keys, utilizing layers similar to a phone keyboard to access numbers and symbols. You will ultimately program the layout of your keyboard to your preference.
⚠️ Not all layouts on splitkbcompare are open source, so you won’t be able to get the file for printing the PCB.
I.2) Designing the PCB
Once you have a layout in mind, you can customize it. While you could use existing Gerber files, customizing your own allows for a truly unique keyboard. I recommend using KiCad for PCB editing.
☑️ You will need software to edit the PCB such as KiCad
Gerber files are used by PCB manufacturers to print each layer of your board. Understanding these layers is key to customization:
.xlnis the Drill layer, indicating where to make holes..gm1specifies the board Edges, defining how the PCB is cut from the mainboard.B_Cu.gblandF_Cu.gtlare the front and back copper layers, where copper wires are printed for connectivity.B_Mask.gtsandF_Mask.gbsare the back and front solder masks, protective layers often green, but other colors are available.B_Silk.gboandF_Silk.gtoare the back and front silkscreens, used for decorative prints and component references.
❗️️️️❗️ ️️️️️If you want to have a quick look at a Gerber file archive, you can use an Online Gerber Viewer (I found it much clearer to understand the different layers).
Customizing these layers allows for extensive personalization. Before making edits, it’s essential to know which components you intend to fit, which is covered in the next section.
II) Choosing the components
II.1) Choosing the switches
There are three primary types of mechanical switches:
- Clicky switches are noisy, providing a satisfying click sound at the end of a stroke.
- Tactile switches are quieter but offer tactile feedback when pressed.
- Linear switches are smooth and silent, with no feedback or noise during typing.
Another important choice is between high-profile and low-profile switches, often associated with Cherry MX and Kailh Chocolate, respectively. Your choice should align with the desired typing feel and whether you want a compact keyboard. For a compact design, low-profile switches are necessary.
❗️️️️ ❗️️️️ There are more brands of key switches; I invite you to read more about it here. Most manufacturers provide both types of profiles, but I noticed that in open-source builds, Kailh was chosen for their low-profile keys and Cherry MX for their high-profile keys.
☑️ You will need to select your switches and download the specs (datasheet). This Github repository contains datasheets for most manufacturers.
Ensure your selected key switches are compatible with your PCB, or be prepared to make necessary edits.
II.2) Choosing the keycaps
Keycap selection mainly depends on compatibility with your chosen switch brand (Cherry MX vs. Kailh Chocolate). Beyond that, explore the numerous options available to express your style. You can even 3D print your own keycaps for ultimate customization.
II.3) Choosing the micro-controller
The microcontroller acts as the keyboard’s brain, translating keystrokes into computer-readable code using the Keyboard Protocol. Thankfully, the open-source QMK firmware simplifies this; you only need to define the keymap using an online configurator and then flash the microcontroller.
Popular microcontroller options include:
- Pro Micro: A common choice, bringing Arduino’s power to your board.
- Elite-C: A higher-end option, ideal for adding features over time.
- Nice!nano: Perfect if you aim for a wireless Bluetooth keyboard.
Microcontroller boards can be the most expensive part of the build, especially since two are often needed for split keyboards. You might consider onboard microcontrollers or SMT assembly if you have the skills to solder the microcontroller directly onto the board.
II.4) Extra designed feature you may want to consider
Enhance your keyboard with additional features:
- Sockets for the microcontroller board: Allows for easy upgrades, like converting to a wireless keyboard.
- Hot-swappable key switches sockets: Enables changing key switches without soldering.
- RGB LEDs: For customizable lighting effects.
- OLED Arduino module: To display information directly on the keyboard.
- Tenting support: Adds an inclination for a more natural wrist position.
☑️ Select your features, study the components, and make adjustments to your PCB.
III) Designing the case
The case provides protection and aesthetic appeal for your keyboard.
One option is using cut acrylic sheets, a simple process that requires no machining and looks great, especially with LEDs.
Alternatively, you can opt for a 3D-printed case. Starting from an existing design and adapting it is often the best approach for customization.
Where to get all the parts?
Once your keyboard is designed, sourcing parts is the next step.
For PCB printing, consider manufacturers like:
For electronic components, various dedicated online stores are available.
For 3D printed objects and cases, you can use services like:
❗️️️️ ❗️️️️ Shipping fees seem to be the most expensive part of this build, so try to find local manufacturers to reduce the costs.
Conclusion
I am currently in the process of ordering all the parts for my build. I will share the results in a follow-up article, including the parts I purchased (approximately $40 per keyboard, excluding shipping fees).
References

My name is